I recently got a question on how to use regex within vRealize Operations to make a symptom if DNS server settings on a host is incorrect. I did a quick google search and found out that info on regex and vROps wasn’t easily available. So here is a litte write up on the process.
Create the Symptom
First we need to create a symptom Go to Configure, Alerts, Symptom Definitions and choose ADD In the Add Symptom Definition view change Base Object Type to Host System and Symptom Type to Properties. In Select Specific Object expand Configuration, Network and double click on DNS Server.
Give the Symptom a resonable Name and on the If Property choose Does not match regular expression. In the Property value field you should now see the value we need to match.
In my case the correct config is [192.168.10.20, 192.168.6.10] so I created a regex that will match on this value. There is probably other ways to create the regex but this worked for me. Regex example: \D192.168.10.20, 192.168.6.10\D
When that is done remember to set wanted Criticality and then save.
Create Alert Definitions
When that is done you can create your alert definitions and use the new symptom. (no step, by step guidance here)
More advanced reqex
In my simple lab setup this regex was doing its job, but for a live production environment it might not be the case, what if some servers have the DNS configured in the opposite way? Then my regex won’t match.
That brings me to the customer use case brought to me by Bernt Christian Torbjørnsen, a vRealize Operations admin and virtualization evangelist. When combining my testing, some brainstorming and a screen sharing session with some trail and error we managed to tweak his regex to work within vROps and this is the code we ended up with.
This regex will result in match if DNS servers is configure in any of thees to ways. [192.168.10.20, 192.168.6.10] or [192.168.10.10, 192.168.6.20]
Hot Tip
If you want to test your expression quicker than waiting for vROps collection cycles, you can create a custom group instead and use your regex there to get instant preview.
In vRealize Operations it seems like we need to match the whole string including [ ] to get a match [192.168.10.20, 192.168.6.10]
VMware just released a security patch for vROps with severity critical. Here is a quick walkthrough on how you can do the patching from vRealize Suite Lifecycle manager.
Patching vROps with vRealize Suite Lifecycle Manager
First you must login to vRSLCM with admin@local account. Then go to Binary Mapping. Click on Patch Binaries and Check Patches Online to update vRSLCM with the latest patches.
When that is done you should have all the latest patches available in the Binary Mapping – > Patch Binaries view. To download the patch you need to click the download icon under Action.
Sadly it is not possible to sort by ReleaseDate or filter by year / month so you need to find it by looking through the pages or filtering by 8.3 in version.
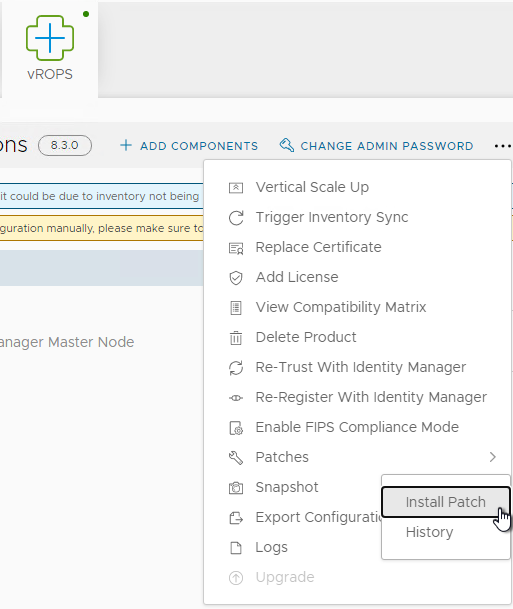
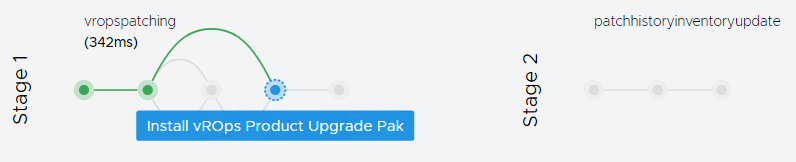
When the patch is downloaded you can head over to the Environments section and find your vROps installations. Choose your deployment and navigate to Install Patch.
Attention: Make sure you have taken your cluster offline and created a snapshot before you proceed.
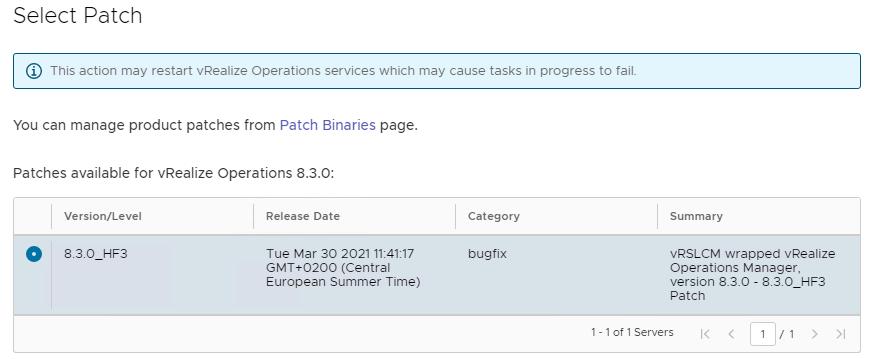
Select the patch and hit next
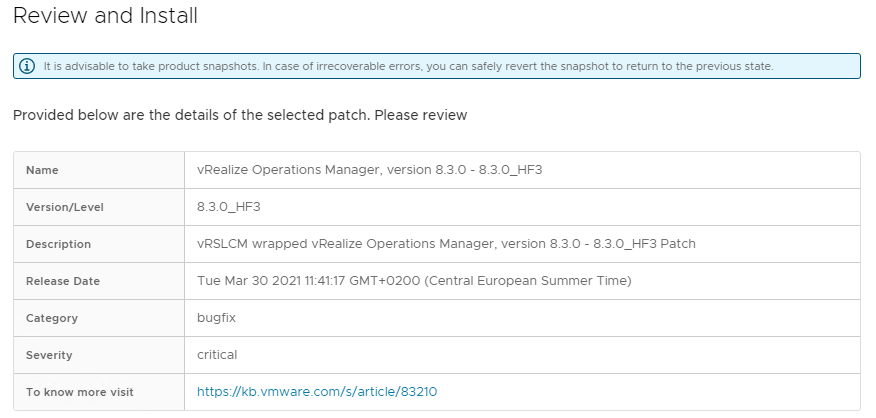
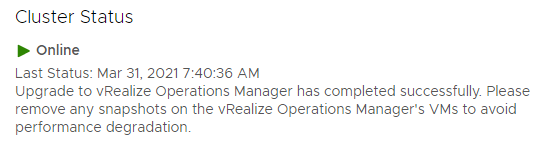
Review and click Install The patch installation will take the cluster offline during the process
vRSLCM will now install the patch for you.
My installation took almost 1 hour but may vary between different setups. Also remember to remove the snapshot when you have verified that everything is working as is should.
Wrap-up
When using the vRSLCM appliance to do patching and upgrades it makes your job easier and its less prone to errors or mistake. It is not perfect but its better than the alternative. I have also added my takeaways from the process and where it could improve.
My tips for improvement
Missing the ability give full admin access to domain authenticated users.
Sort by ReleaseDate option in Binary Mapping -> Patch Binaries view.
Add built inn workflow to take vROps cluster offline, create snapshot and bring online within the upgrade and patch process.
Missing ability to auto download of patches.
Missing built in function to alert of new versions and patches through email. (this should be combined with the SMTP settings in the other products to have a single point of config for SMTP across vRealize.
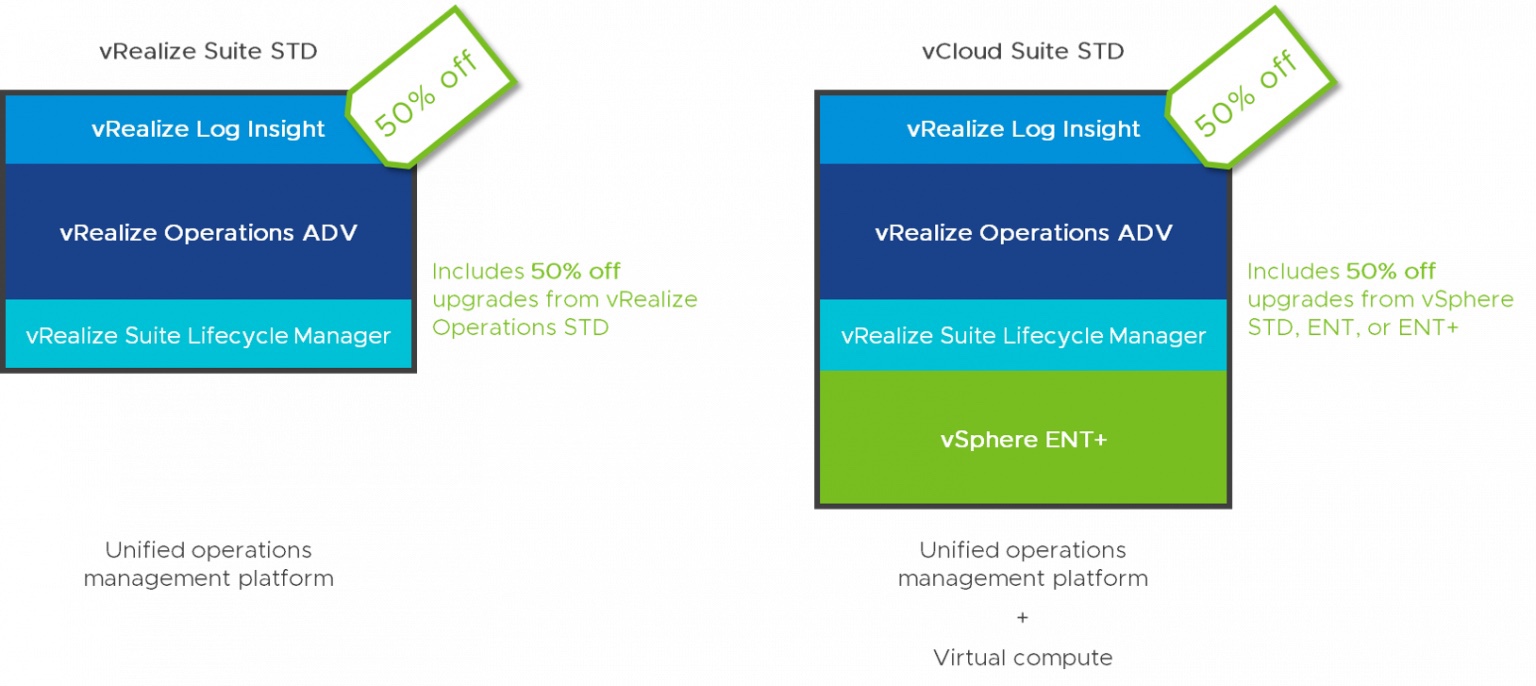
Fra 01.09.2020 startet VMware en kampanje med 50% rabatt på nykjøp og oppgradering til vRealize og vCloud Suite. Kampanjen varer til 22.01.2021 og er en gyllen mulighet til å få produktene i pakken til en rabattert pris.
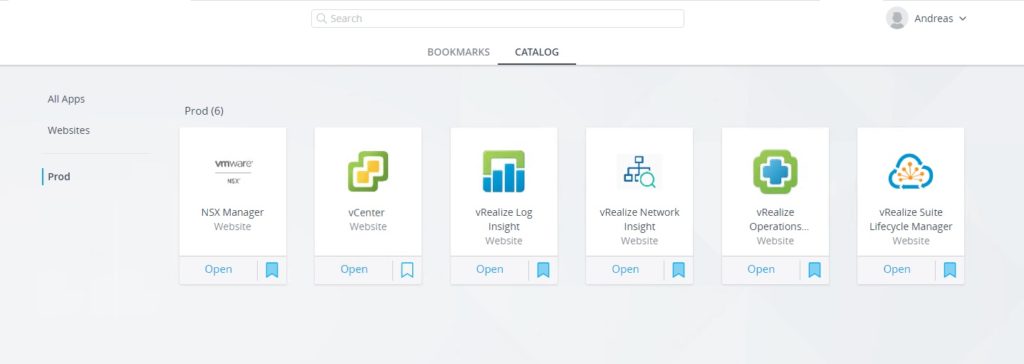
VMware Identity Manager portal satt opp med SSO til alle tjenestene i vRealize Suite I tillegg til NSX og vRealize Network Insight
Hvem kan utnytte rabatten?
De fleste kan utnytte denne rabatten da den gjelder på ny kjøp av vRealize Suite og oppgradering for dem med eksisterende vRealize Operations Standard lisenser (pr CPU) Man kan også benytte rabatten ved oppgradering av vSphere lisenser til vCloud Suite, se listen under for detaljer.
Produktnummer
Produkt Beskrivelse
VR19-STD-PRO
VMware vRealize Suite 2019 Standard (Per PLU) Promo
CL19-STD-PRO
VMware vCloud Suite 2019 Standard Promo
CL19-STD7-STD-UG-PRO
Upgrade: VMware vSphere 7 Standard to vCloud Suite 2019 Standard Promo
CL19-ENT7-STD-UG-PRO
Upgrade: VMware vSphere 7 Enterprise to vCloud Suite 2019 Standard Promo
CL19-EPL7-STD-UG-PRO
Upgrade: VMware vSphere 7 Enterprise Plus to vCloud Suite 2019 Standard Promo
VR19-OSTC-STD-UG-PRO
Upgrade: VMware vRealize Operations 8 Standard (Per CPU) to VMware vRealize Suite 2019 Standard (Per PLU) Promo
When I saw that VMware had updated the SNMP management pack for vROps a little while ago i wanted to test and see what it could be used for. But first I want to thank Steven Bright at https://www.stevenbright.com for making the job a bit easier with his blog Monitoring devices using SNMP in vRealize Operations 8.1 In my post I will go into details on installing the XUPS-MIB file and the creation of the Eaton UPS dashboard.
Before you begin
I would always recommend to check if there is a management pack available for the devices you want to monitor. When it comes Eaton UPS devices a quick search on the VMware Marketplace reveals that there is a management pack, unfortunately it is old and outdated. This is of course a bummer but we can still monitor the devices using SNMP and creating our own views and dashboards. A tip for this dashboard is that you can download the old management pack and extract the UPS icon for use with our Eaton UPS dashboard.
Preparation
So how can I monitor my device using the SNMP management pack. First make sure you have the SNMP details for the devices you want to monitor. And verify if the MIB file is present inside vROps. In my case it was not, so I had to figure out what MIB file to use and where to download the Eaton MIB files. I also made sure the devices was updated with the latest firmware found at Eatons download page.
How to upload MIB files to vROps
To upload the Eaton MIB files to my vROps nodes I tried to follow the VMware documentation on how to upload MIB files. It gives us the info but not all the details. So here’s a detailed description on how I did it.
Step 1
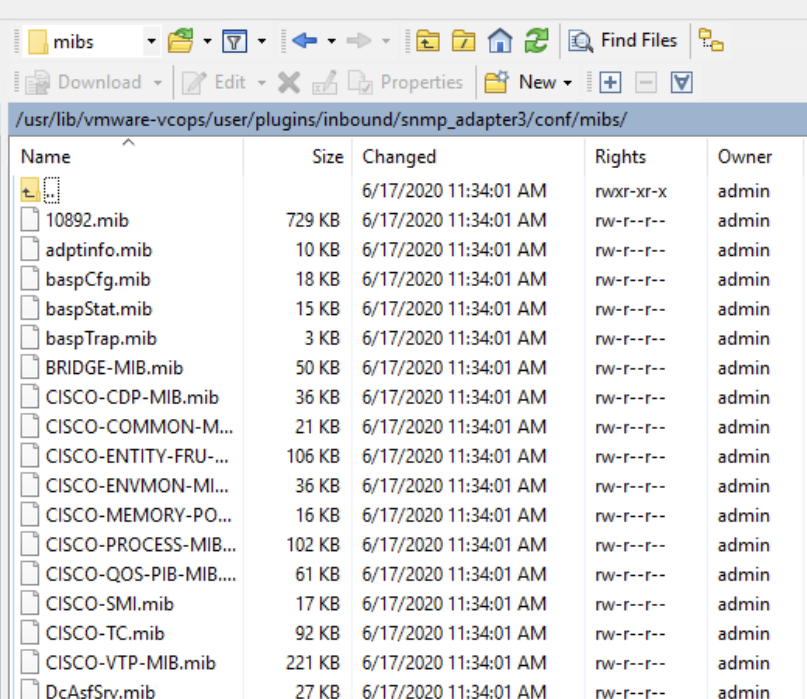
I used WinSCP and Putty when uploading the MIB file and running the script on all vROps nodes. Navigate to the location of the mib files and upload your mib files.
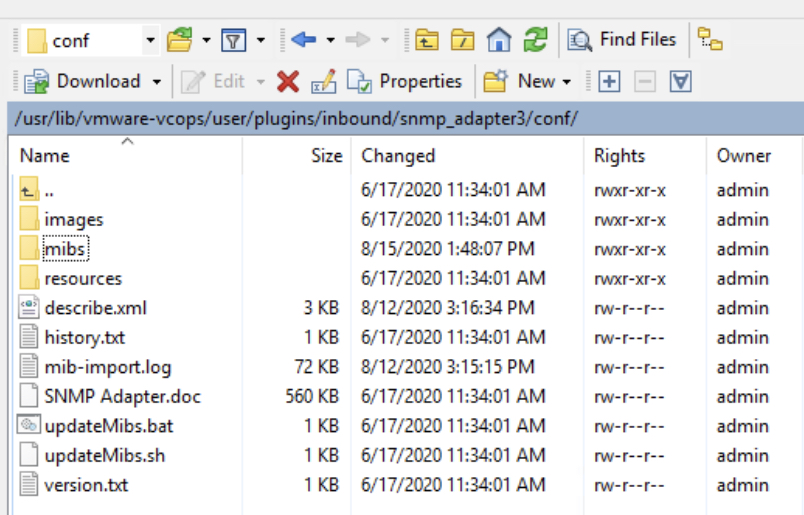
When the mib file is uploaded go to usr/lib/vmware-vcops/user/plugins/inbound/snmp_adapter3/conf and I run the updateMibs.sh script file.
sh updateMibs.sh
When that is done you can check the mib-import.log file to search for your newly imported mib file. If you can’t find it some thing went wrong. Once you have verified that the mib is in the log file you are good to go.
Important: Many of the mib files are called MIB something, make sure that your mib file have the .mib extension or it won’t import. It happened to me once, the filename ended on MIB so I dint see that the .mib extension was missing. This type of issue is easy to miss but also easy to catch if you verify using the mib-import.log after running the updateMibs.sh file.
Step 3
Edit the describe.xml file and update the version number shown in RED.
<?xml version="1.0" encoding="UTF-8"?>
<!-- Copyright (c) 2007-2020 VMware, Inc. All rights reserved -->
<AdapterKind key="SNMPAdapter" nameKey="1" version="9"
xmlns:xsi="http://www.w3.org/2001/XMLSchema-instance"
Make sure step 1-3 is done on all your vrops nodes.
Step 4
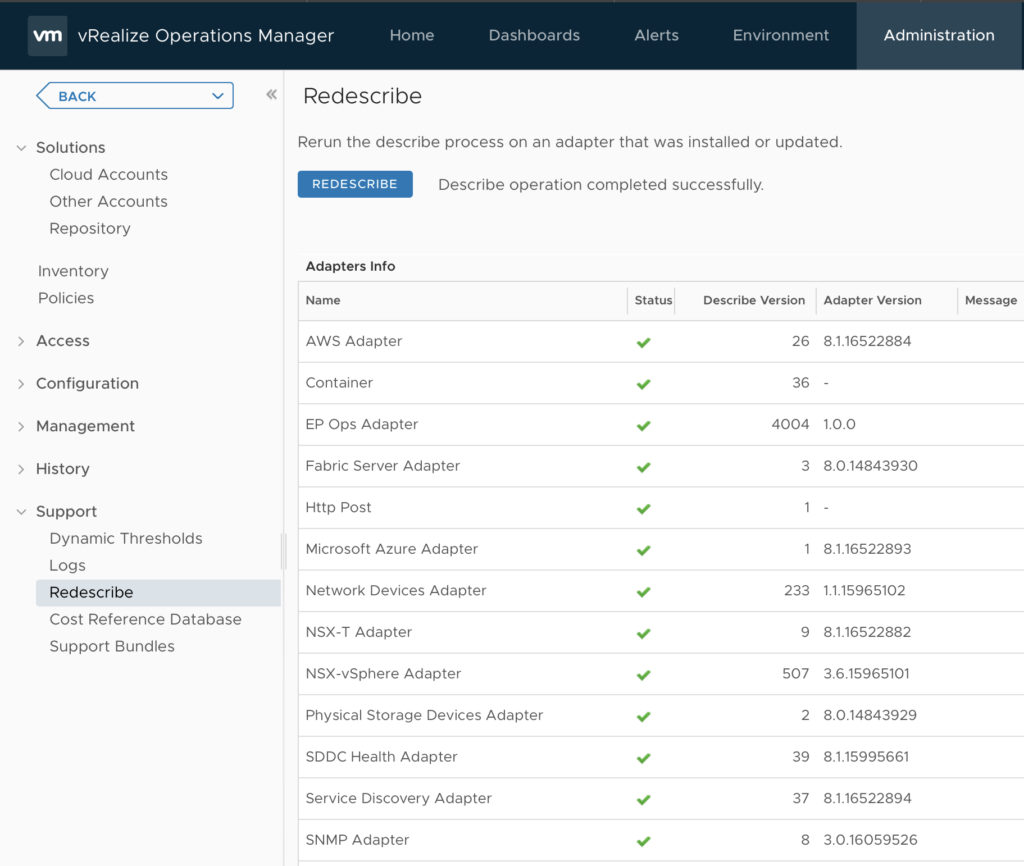
Login to your vROps appliance and run redescribe.
Verify: You can verify that you have done everyting correctly. The number for the SNMP Adapter in the Describe Version column should match the number in the describe.xml file you just updated. When you run the redescribed it should increase to the new number.
You are now done with the import and should be able to add a new adapter and find your newly imported MIB in the adapter mib file list.
Collecting data and creating the dashboard
I won’t go into details on how to add the adapters and create custom groups as that is thoughly described in Stevens blog. But when you have created a custom group for the devices, custom alerts and a new policy for collecting the mib data you need to figure out what data to collect and how to present it. I used Circitor.fr to find some more details about the XUPS-MIB file.
In my case certain UPS models seemed to work fine but no data was received inside vROps. This issue was resolved when I changed the settings to use SNMPv3.
What OIDs to use
I guess it depends on what you want to monitor, present and do trends on. I focused on the following in my dashboard.
For the time remaining the collected data was in seconds so I created the following super metric to convert it to minutes for easier viewing.
floor({
This Resource: XUPS-MIB|iso|org|dod|internet|private|enterprises|powerware|xups|xupsBattery|xupsBatTimeRemaining - OID: .1.3.6.1.4.1.534.1.2.1
}/60)
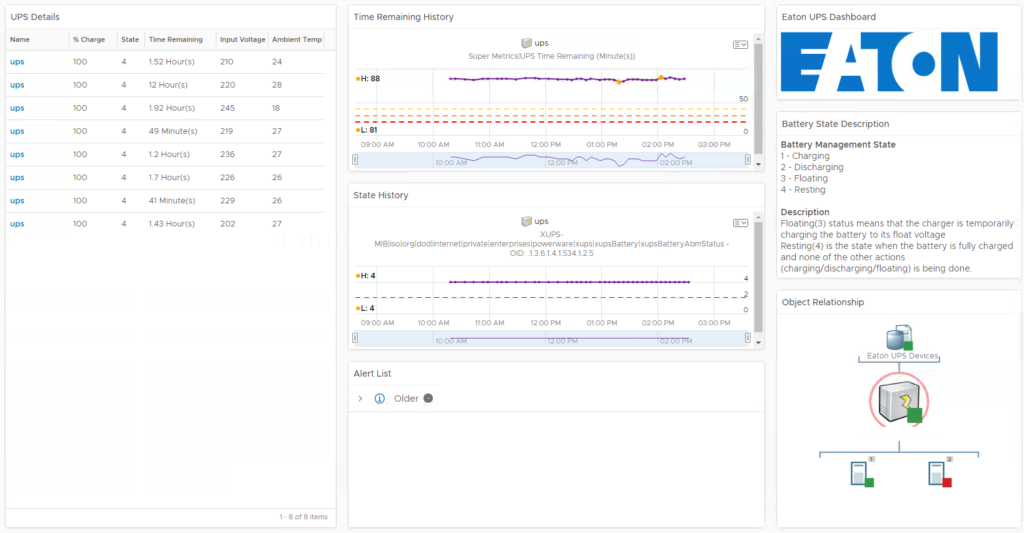
The dashboard
The dashboard I have created consist of a few different components – Object list: This list contains all the UPS units – History: This shows the trend of time remaining and state of the units. – Description: It contains a description on the different states. – Relationship: I have created a relationship from the UPS to the host it provides power to so it is easy to see what is impacted in case of a failure. – Alerts: I tried using syslog from UPS to Log Insight and then into vROps but unfortunately most EATON units I had did not support remote syslog.
vRealize Suite Lifecycle manager contains a feature called Content Management, this can among others be used to backup the content of your vRealize Operations Management Appliance. Like dashboards, views, alerts, super metrics, reports and other customizable content.
How to setup
Add endpoint in vRealize Suite Lifecycle Manager
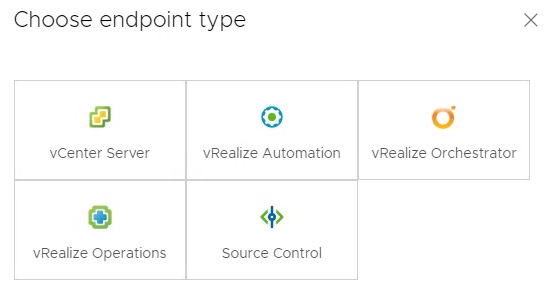
First you need to go to content management in your Lifecycle Manager Dashboard and add a «New Endpoint» Choose vRealize Operations from the «Choose endpoint type» menu.
As you can see it is also possible to add other endpoints as well.
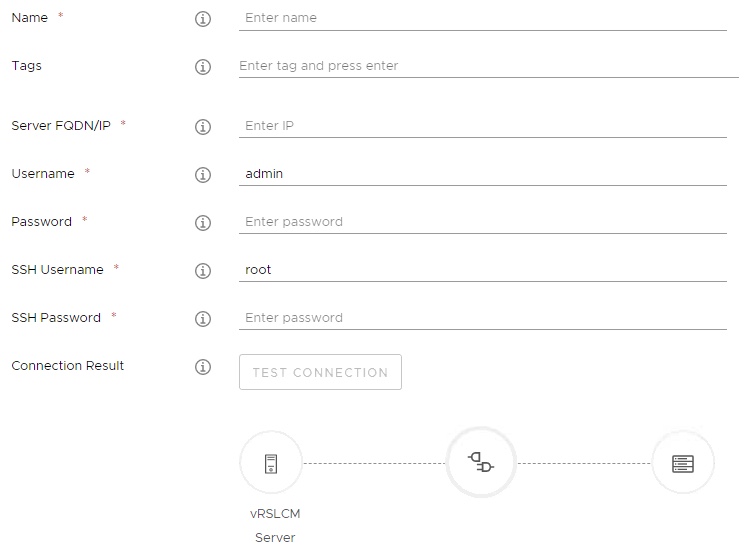
You would then need to add the following details (Name, FQDN, admin and root passwords for your vROps Appliance. Click next and configure policy settings.
Add vRealize Operations Manager as new endpoint.
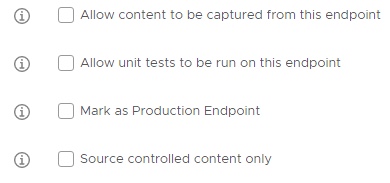
Policy options
In the policy setting you can configure some details about your endpoint. For capturing dashboard we only need «Allow content to be captured from this endpoint»
Capture
When that is done go to the content menu and click add content, choose your newly added vRealize Operations endpoint. Capture is selected as action by default. click proceed.
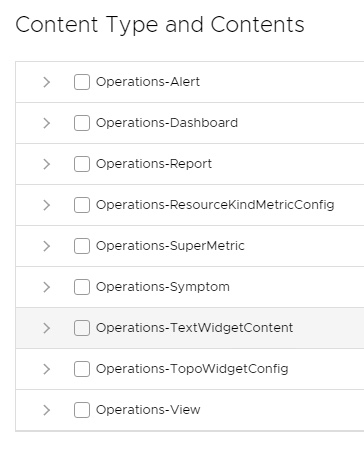
List of content that can be captured
On the capture details page, click the dropdown «select capture endpoint» and select your newly added vROps endpoint. Select what content you want to capture and click done. You must also add a comment before you can hit and hit next and submit.
Now you can watch the progress under content pipelines and under content you will see a list of all the content captured.
If you click on the content, you’ll get to see more details and the option to deploy the content to your endpoints.
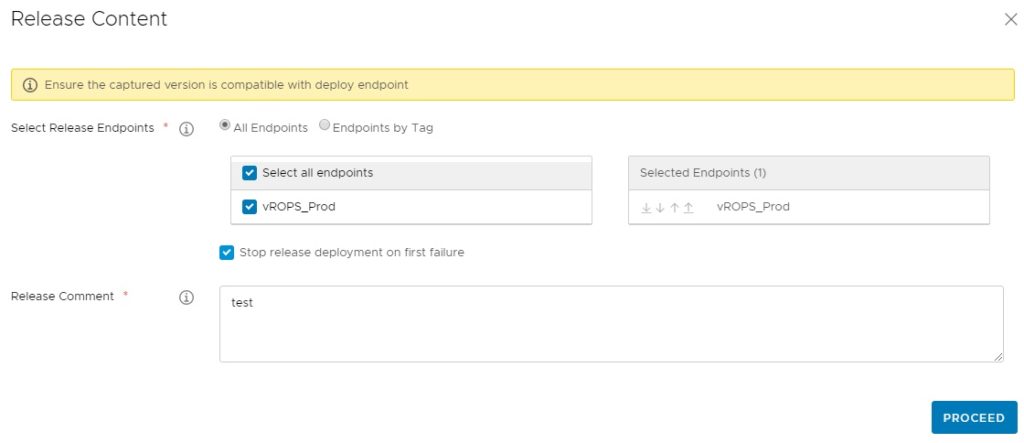
Deploy
Once you have captured your content you can from the content menu deploy it back to the same vROps instance or to another one if you have multiple environments.
Summary
Backup of your customized content is nice if something should happen to it or your vROps environment. This is just one small part of what the content management feature in vRSLCM can be used for.
Issues
During my testing of this feature I got some issues when I tried to capture dashboards owned by other users than the admin user. I’m not sure why this is but I was not able to get it to work.
20.04.2020 I have now tested this with a new clean installation on 8.1 and the issue is the same. It leads me to believe it is a «feature»
Error message was: "Dashboard <dashboardname> not found for user admin"
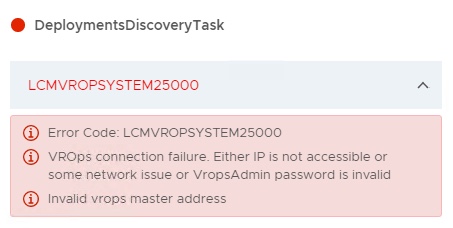
Not long ago the connection between vRealize Lifecycle Manager and vRealize Operations Manager «failed» or to be more specific when I trigger an inventory sync of vRops from vRSLCM. It failed with the error LCMVROPSYSTEM25000
If you have the same issue, here a workaround.
First access your vRops master node https://IPaddressOFvrops/casa/node/config Login with the same credentials used by vRSLCM (admin user) You should get an error message like this:
{«error_message_key»:»general.failure»,»error_arguments»:[«1″,»Note: Forwarding request to ‘systemctl is-enabled’.\n»],»error_message»:»»}
Log into your vRops nodes with root user and run the following command
systemctl list-unit-files
sshd.service status
You should se that sshd.service is listed as disabled. Then run the following command
systemctl enable sshd.service
Do this on all vRops nodes, then go back to vRSLCM and try trigger inventory sync. You should now see that the request goes through.